
Are you craving something sweet but don’t want to heat up the kitchen? No-bake vegan treats are the perfect solution! These delightful desserts are quick to make and require minimal effort while being entirely plant-based and delicious. Whether you’re a seasoned vegan or just exploring healthier dessert options, these treats will satisfy your sweet tooth without the hassle of baking. In this article, we’ll explore a variety of no-bake vegan treats, their benefits, and a featured recipe that you can try at home!
What are No-Bake Vegan Treats?
No-bake vegan treats are desserts made without the use of an oven. They typically consist of wholesome ingredients like nuts, seeds, fruits, and natural sweeteners, and they often come together in just a few minutes. These treats rely on techniques like chilling in the refrigerator or freezer to set, making them perfect for hot summer days or when you want a quick and easy sweet fix.
Benefits of No-Bake Vegan Treats Recipes
- Healthier Options: No-bake treats often include whole food ingredients, reducing refined sugars and unhealthy fats. They can be packed with fiber, healthy fats, and nutrients.
- Convenience: With no cooking required, these recipes save you time. They are perfect for when you’re short on time or need a last-minute dessert.
- Allergy-Friendly: Many no-bake vegan recipes are free from common allergens like dairy and eggs, making them suitable for a variety of dietary needs.
- Delicious Flavor: The natural ingredients in no-bake vegan treats offer a wide range of flavors and textures that are both satisfying and enjoyable.
Popular Types of No-Bake Vegan Treats
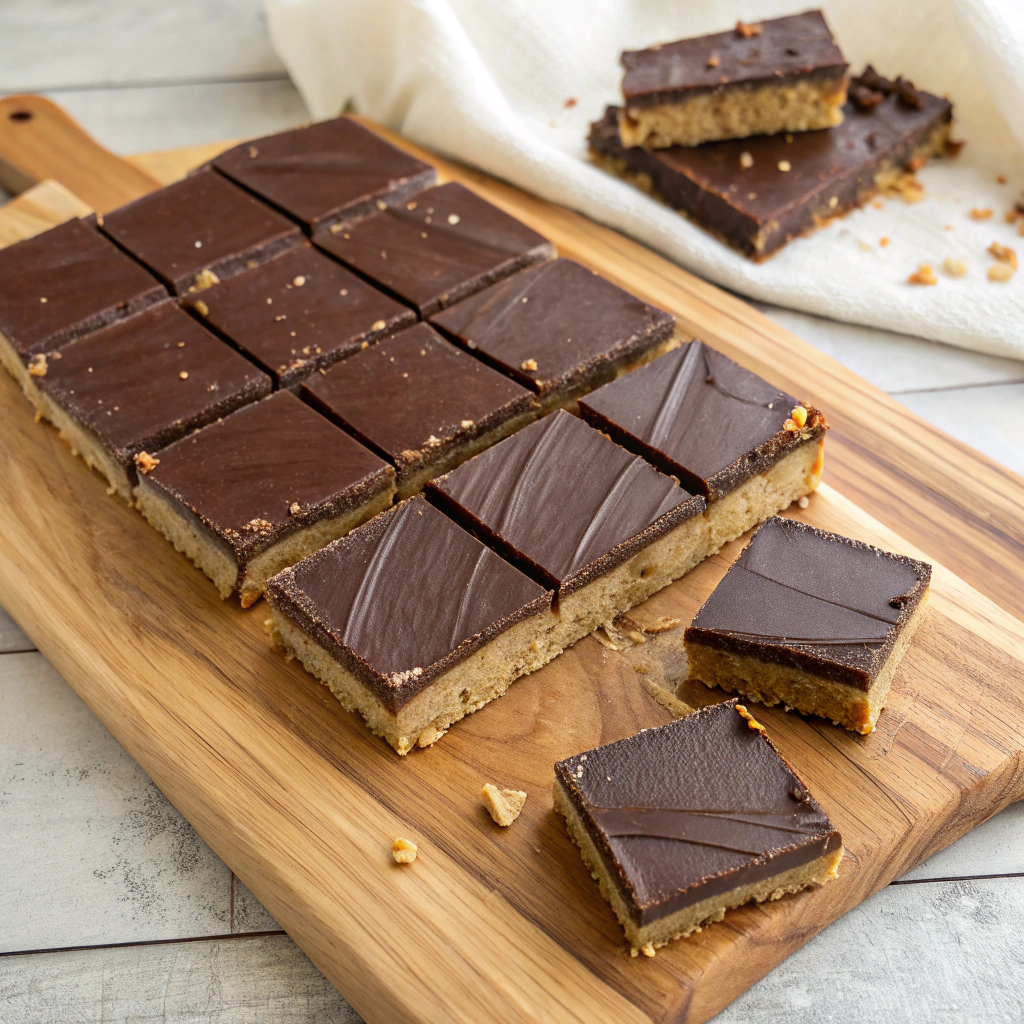
1.No-Bake Chocolate Peanut Butter Bars
Prep Time: 15 minutes
Cook Time: 0 minutes
Servings: 12 bars
Ingredients
- 1 cup rolled oats
- 1/2 cup almond flour
- 1/2 cup natural peanut butter
- 1/3 cup maple syrup
- 1/4 cup cocoa powder
- 1/4 teaspoon salt
- 1/2 cup dairy-free chocolate chips (for topping)
Step-by-Step Instructions
- Prepare the Pan: Line an 8×8-inch baking dish with parchment paper, leaving some overhang for easy removal.
- Mix Dry Ingredients: In a large bowl, combine rolled oats, almond flour, cocoa powder, and salt.
- Add Wet Ingredients: Stir in the natural peanut butter and maple syrup until the mixture is well combined and sticky.
- Press into the Pan: Transfer the mixture to the prepared baking dish and press it down firmly with your hands or a spatula, creating an even layer.
- Melt Chocolate: In a microwave-safe bowl, melt the dairy-free chocolate chips in 30-second intervals until smooth.
- Spread Chocolate: Pour the melted chocolate over the pressed mixture, spreading it evenly with a spatula.
- Chill: Place the baking dish in the refrigerator for about 1-2 hours until the bars are set.
- Slice and Serve: Once set, lift the bars out of the pan using the parchment paper overhang and slice them into squares.
Pro Tips for Success
- Make sure the peanut butter is creamy for easier mixing.
- Press the mixture firmly into the pan to ensure the bars hold together when cut.
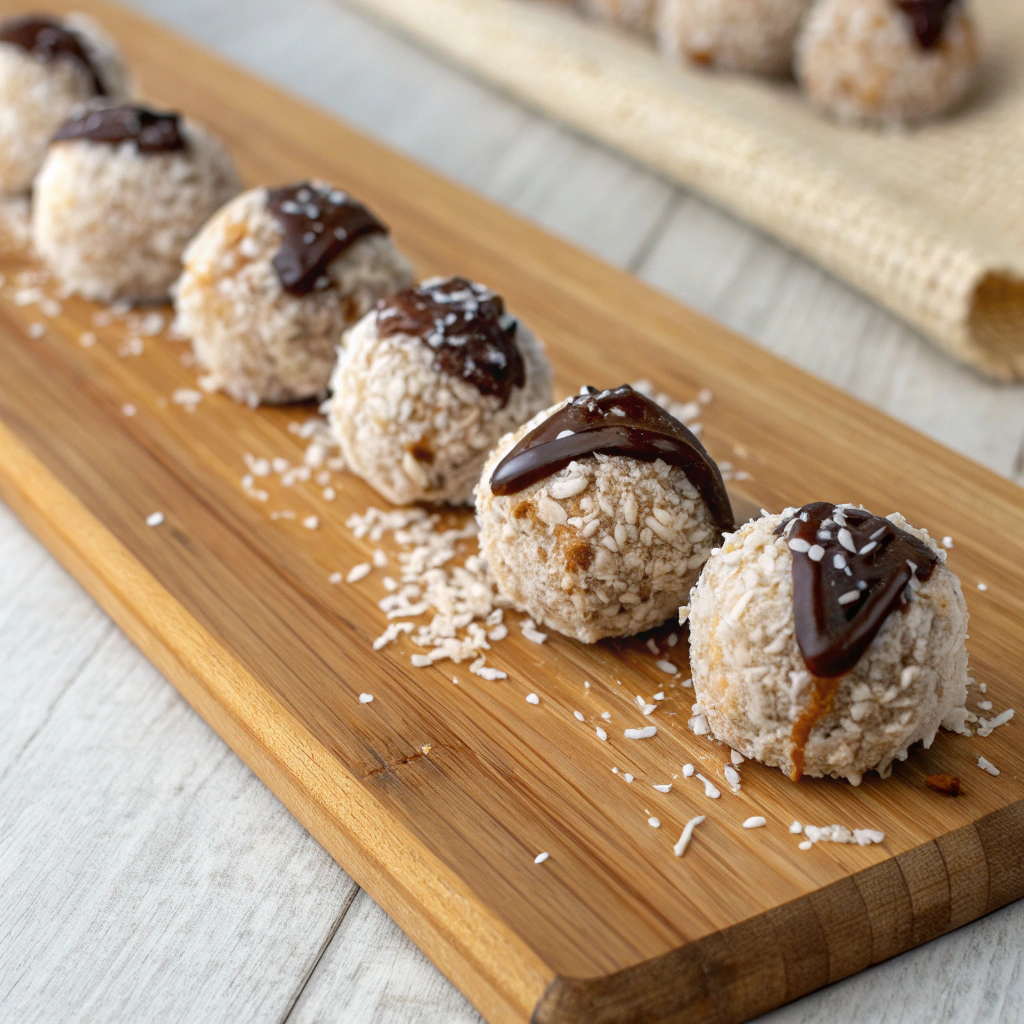
2. No-Bake Vegan Chocolate Coconut Energy Bites
Prep Time: 10 minutes
Servings: 12 bites
Ingredients:
- 1 cup rolled oats
- 1/2 cup unsweetened shredded coconut
- 1/4 cup almond butter (or any nut/seed butter)
- 1/4 cup maple syrup
- 1/4 cup cocoa powder
- 1/2 tsp vanilla extract
- Pinch of salt
Instructions:
- In a mixing bowl, combine the rolled oats, shredded coconut, almond butter, maple syrup, cocoa powder, vanilla extract, and salt.
- Mix until well combined and the mixture is sticky.
- Roll the mixture into bite-sized balls and place them on a parchment-lined tray.
- Refrigerate for at least 30 minutes to firm up before serving.
Notes: Store in an airtight container in the refrigerator for up to a week.
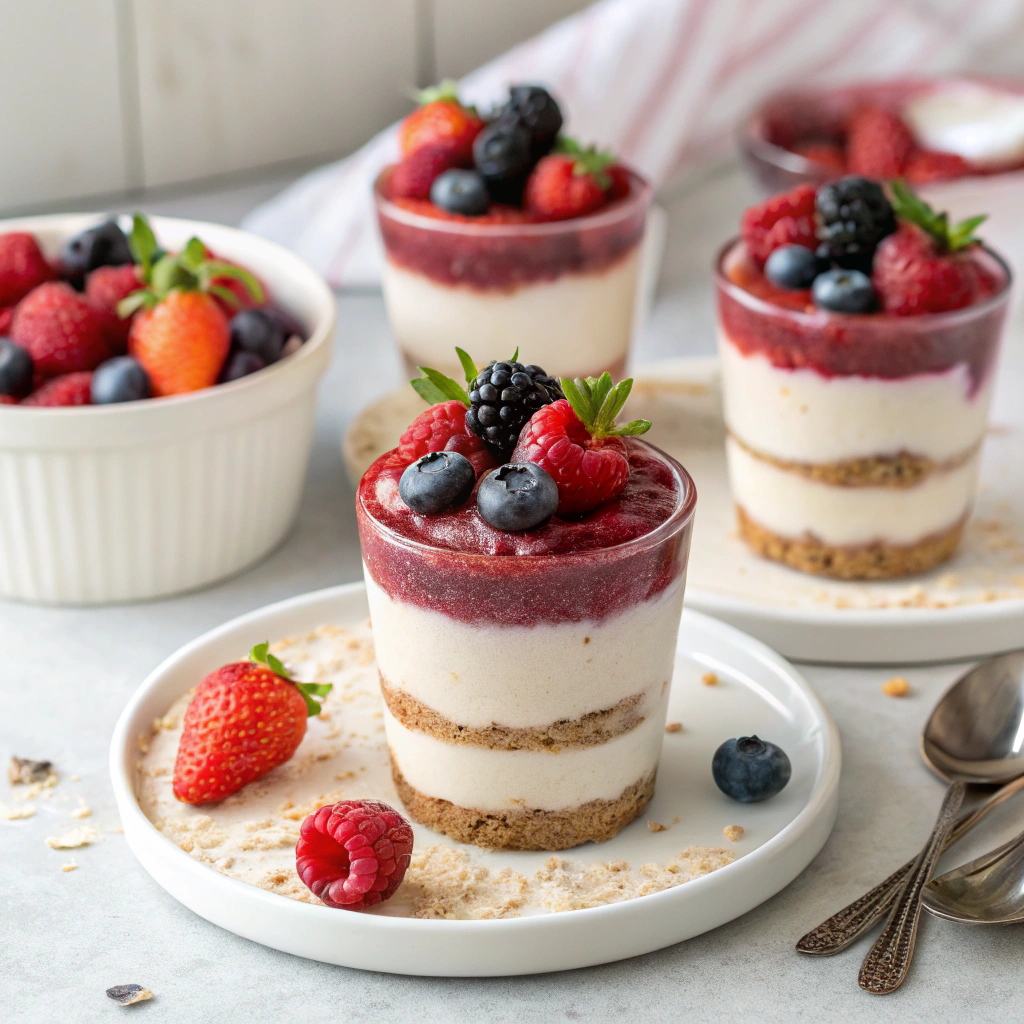
3. No-Bake Vegan Cheesecake Cups
Prep Time: 20 minutes
Servings: 4 cups
Ingredients:
- 1 cup raw cashews (soaked for 4 hours, then drained)
- 1/4 cup coconut milk
- 1/4 cup maple syrup
- 2 tbsp lemon juice
- 1 tsp vanilla extract
- A pinch of salt
- 1 cup crushed graham crackers (or a gluten-free alternative)
Instructions:
- In a blender, combine soaked cashews, coconut milk, maple syrup, lemon juice, vanilla extract, and salt. Blend until smooth and creamy.
- Crush graham crackers and layer the bottom of serving cups with them.
- Spoon the cashew mixture over the graham cracker layer.
- Refrigerate for at least 2 hours until set.
- Top with fresh berries or your favorite fruit topping before serving.
Notes: These can be made ahead of time and stored in the refrigerator for up to 3 days.
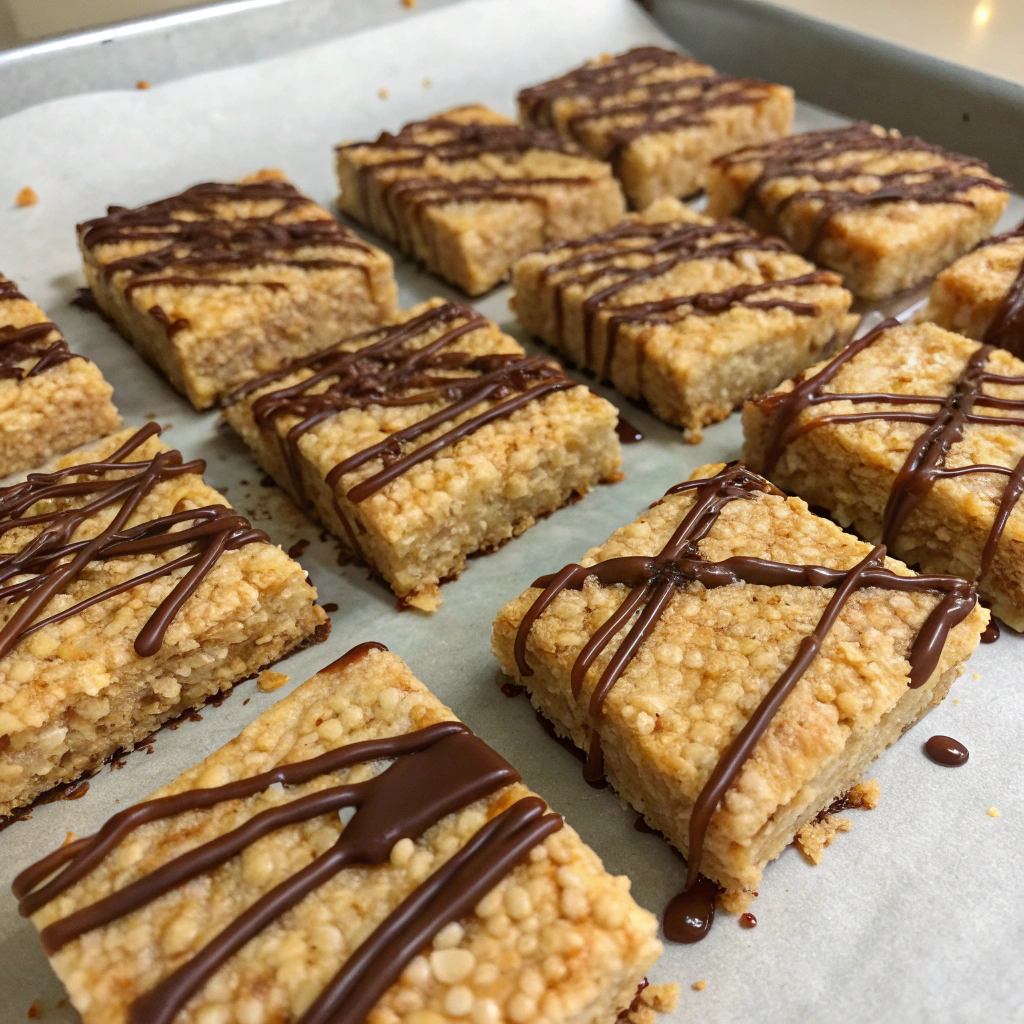
4. No-Bake Vegan Chocolate Rice Crispy Treats
Prep Time: 15 minutes
Servings: 12 treats
Ingredients:
- 3 cups brown rice cereal
- 1/2 cup almond butter
- 1/2 cup maple syrup
- 1/4 cup cocoa powder
- 1 tsp vanilla extract
- A pinch of salt
Instructions:
- In a saucepan, combine almond butter, maple syrup, cocoa powder, vanilla extract, and salt over low heat. Stir until well combined and smooth.
- Remove from heat and mix in the brown rice cereal until evenly coated.
- Press the mixture into a lined 8×8-inch baking dish.
- Allow the bars to cool and set in the refrigerator for about 30 minutes.
- Once set, cut into squares and serve.
Notes: These can be stored in an airtight container at room temperature for up to a week.
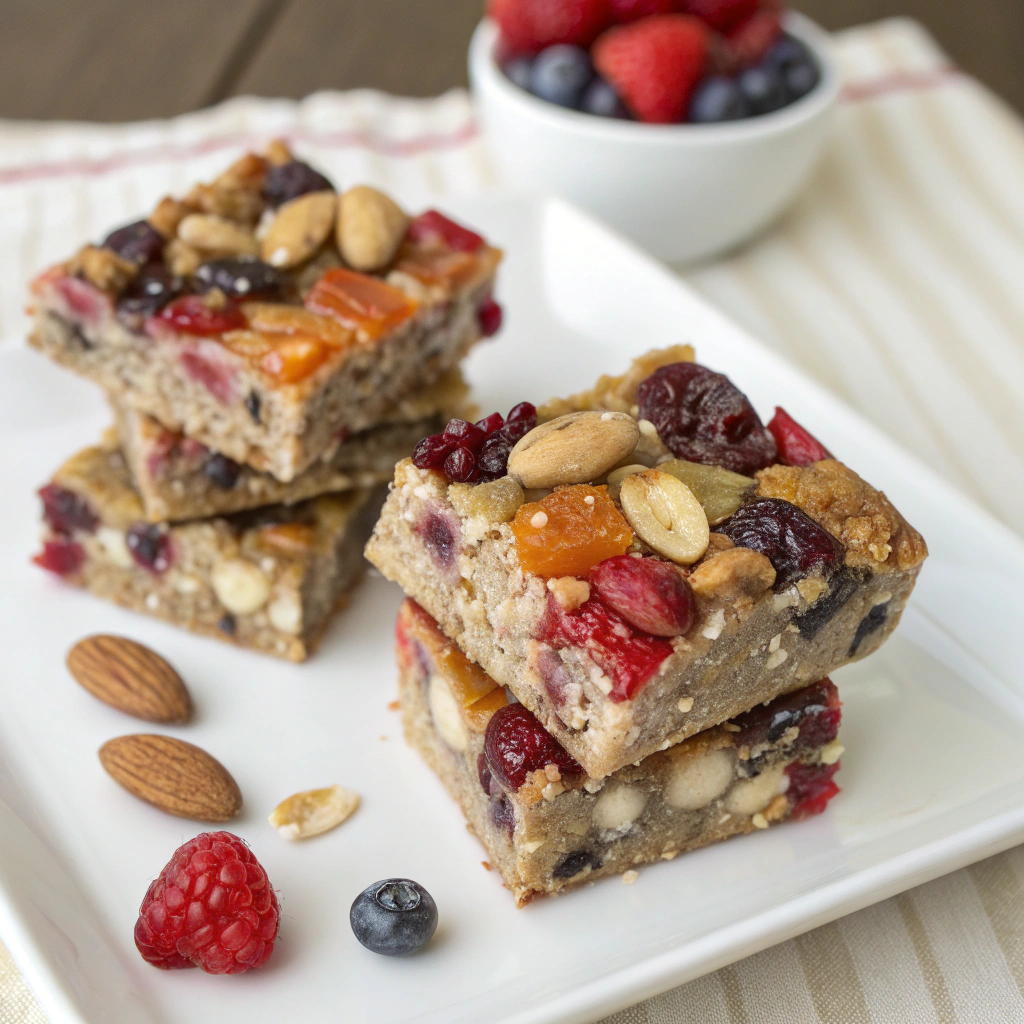
5. No-Bake Vegan Fruit and Nut Bars
Prep Time: 10 minutes
Servings: 10 bars
Ingredients:
- 1 cup mixed nuts (almonds, walnuts, pecans)
- 1 cup dried fruits (dates, apricots, or figs)
- 1/2 cup rolled oats
- 2 tbsp flaxseeds or chia seeds
- 1/4 cup nut butter or sun butter
- 1/4 cup maple syrup
- Pinch of salt
Instructions:
- In a food processor, pulse together the nuts and dried fruits until finely chopped.
- Add rolled oats, flaxseeds, nut butter, maple syrup, and a pinch of salt; pulse until the mixture is well combined.
- Line an 8×8-inch baking dish with parchment paper and transfer the mixture into the pan. Press down firmly to create an even layer.
- Refrigerate for 1 hour to set. Cut into bars before serving.
Notes: Wrap bars individually for a convenient snack on the go.
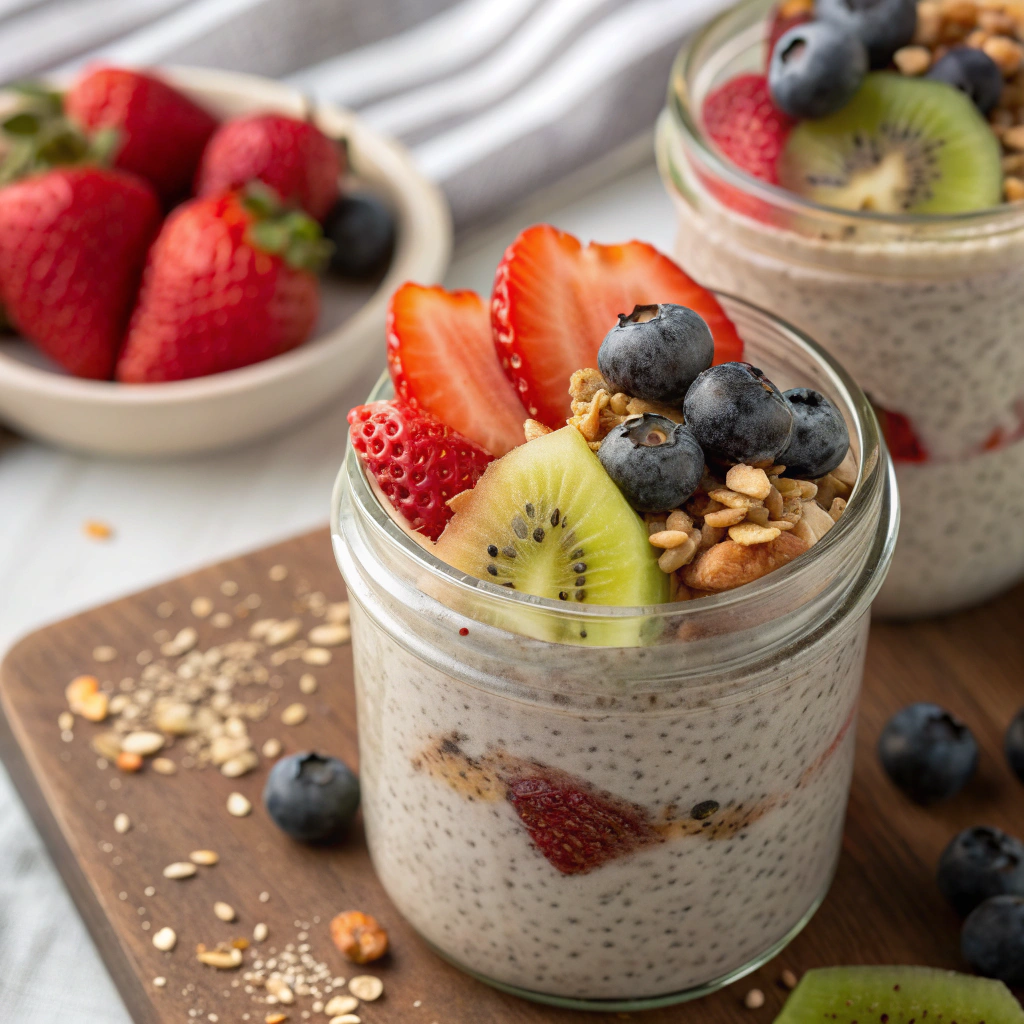
6. No-Bake Vegan Chocolate Chia Pudding
Prep Time: 10 minutes
Servings: 2 servings
Ingredients:
- 1/4 cup chia seeds
- 1 cup almond milk (or any plant-based milk)
- 2 tbsp cacao powder
- 2 tbsp maple syrup
- 1/2 tsp vanilla extract
- A pinch of salt
Instructions:
- In a mixing bowl, whisk together chia seeds, almond milk, cacao powder, maple syrup, vanilla extract, and a pinch of salt.
- Let the mixture sit for about 10 minutes, then whisk again to prevent clumping of the chia seeds.
- Cover the bowl and refrigerate for at least 1 hour, or overnight, until the chia seeds have absorbed the liquid and the mixture has thickened to a pudding-like consistency.
- Once set, stir the pudding well before serving and top with fresh fruits, nuts, or dairy-free whipped cream as desired.
Notes: This chia pudding can be stored in the refrigerator for up to 4-5 days, making it a perfect meal prep option.
Check out our 10 Indulgent Vegan Desserts for a variety of sweet treats to satisfy your cravings.
Common Mistakes to Avoid
- Not Letting the Treats Set Long Enough: Proper chilling or setting time is crucial for no-bake treats. Don’t rush this step, as it affects both texture and taste. Allow enough time in the refrigerator or freezer to achieve the right firmness.
- Using Insufficient Binding Agents: Ensure you use enough nut butters, syrups, or other sticky ingredients to help the treats hold together. If the mixture crumbles too easily, it may need more binding ingredients.
- Looking for more plant-based options? Explore 5 Delicious Vegan Dinners for satisfying meal ideas
Variations & Substitutions
- Sweeteners: Feel free to substitute maple syrup with agave nectar, honey (if not strictly vegan), or a powdered sugar substitute to suit your dietary preferences.
- Mix-ins: Add your favorite flavorings, such as cinnamon, cocoa nibs, or extracts like almond or peppermint, to personalize your treats. You could also incorporate different nuts or seeds based on what you have available.
- Base Alternatives: Swap out rolled oats for gluten-free oats if you’re avoiding gluten, or use different nut butters like cashew or sunflower seed butter for varied flavor profiles.
- Discover elegant meal options with our Dinner French Recipes that bring a touch of sophistication to your tables.
Storage & Make-Ahead Tips
- Refrigeration: Most no-bake vegan treats are best stored in the refrigerator, where they’ll stay fresh and tasty for about a week. Make sure to use airtight containers to maintain their texture and flavor.
- Freezing: Many treats can be frozen for longer storage periods. Just be sure to use airtight containers or freezer-safe bags to prevent freezer burn. Thaw them in the refrigerator for a few hours before serving.
- For quick and nutritious meals, try our Easy Salad Jars Recipes that are perfect for busy days.
- Celebrate with our lovely Valentine’s Desserts that will impress anyone on your special day.
FAQs About no-bake vegan treats
Q: Can I make no-bake vegan treats without nuts?
A: Yes! You can substitute nuts with seeds such as pumpkin seeds or sunflower seeds, and use sunflower seed butter or tahini as alternatives to nut butters. This keeps the treats nut-free while still ensuring they have a rich taste and texture.
Q: How long do no-bake vegan treats last?
A: Properly stored in an airtight container, no-bake vegan treats can last up to a week in the refrigerator. If you want to store them longer, many can be safely frozen for several months. Just be sure to separate them with parchment paper if freezing in a container.
Q: Are no-bake vegan treats healthy?
A: Many no-bake vegan treats can be healthy, as they often include whole food ingredients like oats, fruits, nuts, and seeds. However, it’s crucial to read the recipe ingredients to ensure they align with your health goals—some treats may be higher in sugars or fats.
Q: Can I customize no-bake vegan treat recipes?
A: Absolutely! You can add various flavors, mix-ins, or toppings to your no-bake treats to suit your preferences. Feel free to experiment with different ingredients like spices, extracts, or even superfoods such as spirulina or maca powder.
Q: Are no-bake vegan treats suitable for meal prep?
A: Yes, no-bake vegan treats are perfect for meal prepping! You can make a large batch, store them in the fridge or freezer, and have a quick snack on hand for the entire week.
Q: Can I use regular dairy ingredients instead of vegan ones?
A: While these recipes are specifically designed to be vegan, you can substitute regular dairy ingredients if you are not concerned about adhering to vegan dietary restrictions. However, be mindful that it may alter the flavor and texture of the treats.
Q: What are some good topping ideas for no-bake treats?
A: Great topping options include shredded coconut, chopped nuts or seeds, cacao nibs, vegan chocolate drizzle, or fresh fruit. These can add an appealing finish to your no-bake desserts and enhance their flavor.
Q: Can I incorporate protein powder into no-bake vegan treats?
A: Yes, adding plant-based protein powder to your no-bake treats is a fantastic way to increase their nutritional value. Just be sure to adjust the other ingredients accordingly to maintain the right texture.
Conclusion to No-bake vegan treats
No-bake vegan treats are not only a convenient alternative to traditional desserts but also provide a delicious way to enjoy sweet flavors without turning on the oven. From rich chocolate peanut butter bars to energy bites, there’s a no-bake recipe for everyone. We hope you enjoyed learning about these easy recipes and tips for making them.
Don’t hesitate to try your hand at these delightful treats, and share your creations with friends and family! We would love to hear about your experiences, so feel free to leave a comment below, share your favorite no-bake vegan treat recipes, or let us know how you customized these recipes to suit your taste. Happy no-baking!
- If you’re planning a romantic meal, check out our Valentine’s Day Ready Recipes for the perfect dinner.
- Add some flavor to your meals with these Spanish Rice Recipes that pair well with various dishes.
For more delicious recipes and baking inspiration, come join us on Facebook at RyanRecipes. Follow us to stay updated with our latest creations and share your culinary adventures with our vibrant community!
Incorporating no-bake vegan treats into your culinary repertoire allows you to explore a diverse range of flavors while adhering to a plant-based lifestyle. These recipes not only satisfy your sweet tooth but also promote a healthier approach to indulgence. We encourage you to experiment with various ingredients to customize these treats to your liking. Join our community on Facebook at RyanRecipes for additional inspiration and to connect with fellow enthusiasts.