
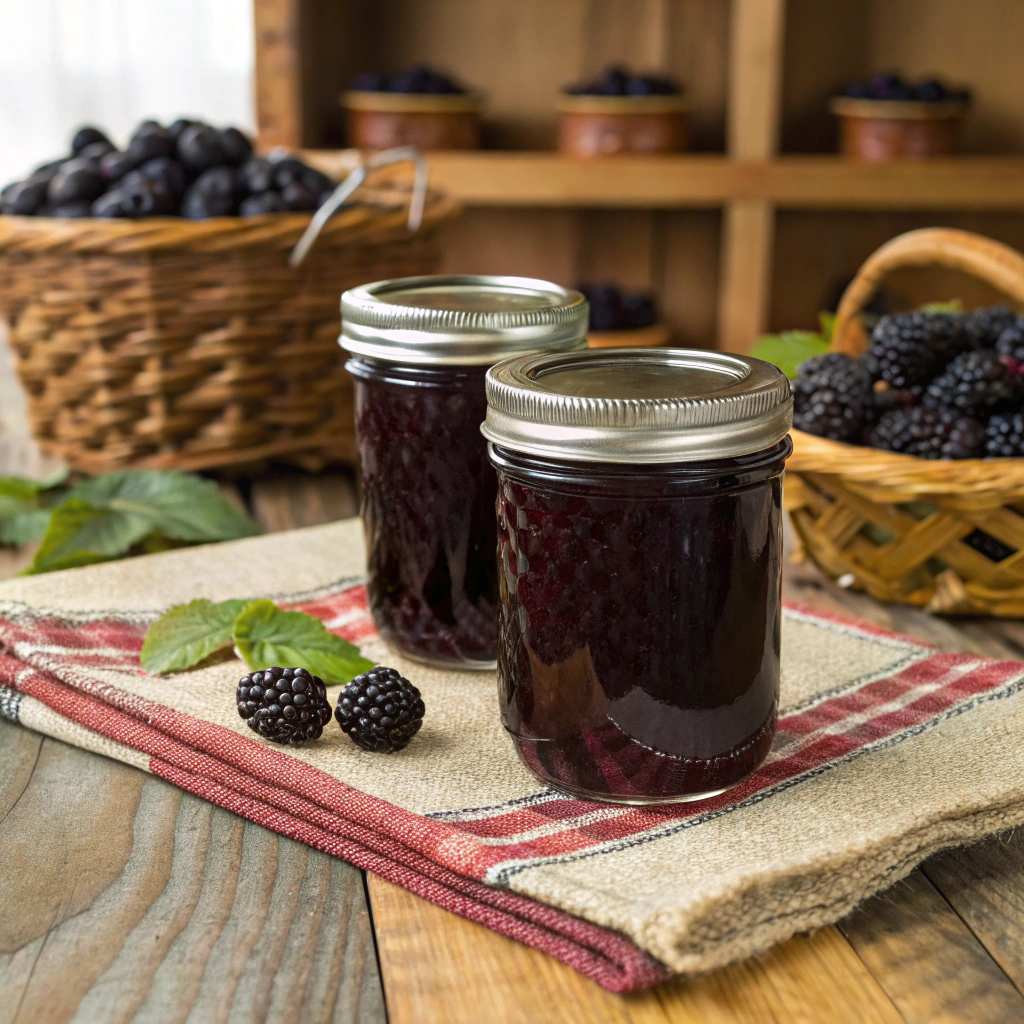
Homemade blackberry jelly and jam recipe brings the bright, sun‑ripened flavor of summer berries into your kitchen. This dual approach gives you both a smooth, clear jelly and a textured, fruity jam from the same harvest, so you can choose spreadable elegance or rustic heartiness. Perfect on toast, swirled into yogurt, dolloped on warm biscuits, or paired with cheese, these preserves are versatile at breakfast, lunch, or dinner. Making your own preserves lets you control sugar, pectin, and flavor additions, producing fresher, more vibrant results than most store jars and creating memorable gifts and pantry staples.
Why Choose This Homemade blackberry jelly and jam recipe
- Flavor and Freshness: Fresh blackberries offer a complex balance of sweet and tart flavors and deep color that store-bought products rarely match. Homemade preserves capture that peak-season intensity.
- Ingredient Control: You choose sugar level, type of pectin, and any added flavors (vanilla, citrus, spices), enabling adaptations for dietary needs (reduced sugar, natural sweeteners).
- Economical: When berries are in season or foraged, making jam/jelly at home can be significantly less expensive than artisan jars.
- Versatility: Jam adds body and texture for rustic uses; jelly offers a smooth, clear option for glazes, fillings, and elegant pairings. Both can be used in baking, sauces, dressings, and drinks.
- Tradition and Satisfaction: Preserving fruit is a gratifying, time-honored practice that connects you to seasonal rhythms and family traditions.
- Nutritional Benefits: Blackberries are rich in vitamin C, fiber, and antioxidants (anthocyanins). Homemade preserves let you moderate added sugar and preserve more natural goodness.
Timing and Number of Portions of Homemade Blackberry Jelly and Jam Recipe
- Prep time: 30–45 minutes (washing, hulling, measuring, sterilizing jars)
- Cooking time (jam): 20–30 minutes active boiling to reach gel stage
- Cooking time (jelly): 30–45 minutes for juice extraction plus 10–15 minutes to reach gel
- Canning/processing time: 10 minutes per jar in a boiling water bath (plus time to bring water to boil)
- Total time (jam): about 1.5–2 hours (including sterilizing and cooling)
- Total time (jelly): about 2–2.5 hours (including juice extraction and cooling)
- Yield (example batch): Using 6 cups fresh blackberries (about 2 lbs)
- Jam: ~4 half‑pint (8 fl oz) jars (roughly 24–36 two‑tablespoon servings)
- Jelly: ~3–4 half‑pint jars (yield varies with juice extraction)
Ingredients For Homemade blackberry jelly and jam recipe

Base quantities (yields ~4 half‑pint jam jars or 3–4 jelly jars).
For Blackberry Jam:
- 6 cups fresh blackberries (≈ 2 pounds)
- 3 to 3 1/2 cups granulated sugar (3 1/4 cups is a common balance)
- 2 tablespoons fresh lemon juice
- 1 packet fruit pectin (optional; typical packet ≈ 1.75 oz / 49 g). Use low‑sugar pectin for reduced sugar recipes, or omit for long-cook free-set jam.
For Blackberry Jelly:
- 6–8 cups fresh blackberries (8 cups yields more juice)
- 3 to 4 cups granulated sugar (adjust per measured juice and pectin instructions)
- 3 tablespoons fresh lemon juice
- 1 packet powdered pectin (optional; speeds setting and clarifies)
Optional additions (per batch):
- 1/2 teaspoon vanilla extract or seeds from 1/2 vanilla bean (jam)
- 1/2 teaspoon cinnamon, pinch nutmeg, or 1 star anise (for spiced versions)
- Zest of 1 lemon or orange for brightness
- 1/4 to 1/2 cup honey or maple syrup (partial substitution of sugar; adjust pectin/use low-sugar pectin)
Choosing the best blackberries For Homemade blackberry jelly and jam recipe
- Ripeness: Select plump, deep-black berries with glossy sheen; avoid red or underripe fruits.
- Freshness: Avoid mold, mushy spots, or crushed fruit inside packages.
- Aroma: Ripe blackberries are fragrant and slightly sweet.
- Variety: Garden, thornless, or wild blackberries all work; wild berries can have more intense flavor but smaller yield.
- Frozen: Frozen berries thawed and drained can be used year-round but may yield more juice and require recipe adjustments.
Pectin and sugar notes For Homemade blackberry jelly and jam recipe:
- Regular pectin requires the sugar amounts specified on the pectin package to set properly. Low‑sugar pectin is formulated for reduced-sugar recipes.
- No‑pectin jam relies on natural pectin content (use lemon and some underripe fruit or add apple peel/core to increase pectin) and longer cooking to concentrate.
Equipment For Homemade blackberry jelly and jam recipe
- Large heavy‑bottomed pot (stainless steel or enamel)
- Potato masher or immersion blender
- Jelly bag, cheesecloth, or fine mesh sieve (for jelly)
- Candy thermometer (optional, gel point 220°F/105°C at sea level)
- Sterilized jars and lids (half‑pint or pint)
- Canning pot with rack (for boiling water bath)
- Ladle and canning funnel
- Slotted spoon and clean cloths
Step-by-Step Preparation for Homemade blackberry jelly and jam recipe

Make Blackberry Jam (chunky)
- Sterilize jars and lids: Wash jars, lids, and bands in hot, soapy water. Place jars in a large pot of boiling water for 10 minutes to sterilize; keep warm. Keep lids in simmering water (do not boil) to soften the sealing compound.
- Prepare fruit: Rinse blackberries gently in cold water and drain. Remove stems, leaves, and obviously damaged berries. If using frozen berries, thaw and drain excess liquid or use as-is and reduce added water.
- Mash fruit: Place berries in a large, heavy pot. Mash with a potato masher for chunky jam, or use an immersion blender for a smoother texture. Leave some whole berries if you prefer pieces.
- Add lemon juice: Stir in 2 tablespoons fresh lemon juice per the batch — acidity boosts pectin action and flavor.
- Add pectin (if using): Follow packet directions. Some pectin types call for mixing with sugar first; others are stirred into the fruit before heating. Read the package.
- Bring to a rolling boil: Over medium-high heat, bring mashed fruit (and pectin if instructed) to a full rolling boil — a boil that cannot be stirred down.
- Add sugar: Add sugar all at once, stirring to dissolve. Return to a full rolling boil and boil hard for 1–3 minutes (or per pectin directions) while stirring constantly to prevent scorching.
- Test for set: Use the chilled-plate test — place a cold spoon or plate in the freezer beforehand; spoon a small amount of jam onto the cold plate, chill for 30–60 seconds, then push; if it wrinkles and doesn’t run, it’s set. Alternatively, monitor temperature: 220°F (105°C) is the gel point at sea level.
- Skim foam: Remove foam from the surface with a spoon for clearer appearance.
- Jar the jam: Using a ladle and funnel, fill hot, sterilized jars leaving 1/4 inch headspace. Wipe rims clean, center hot lids, and screw bands fingertip-tight.
- Process jars: Place jars on the canner rack, cover with boiling water (1–2 inches above jars), and process 10 minutes (adjust for altitude per canning guidelines). Remove carefully and let jars cool undisturbed 12–24 hours.
- Check seals and store: After cooling, lids should be concave and not flex. Remove bands, wipe jars, label with date, and store in cool dark place. Refrigerate opened jars.
Make Blackberry Jelly (clear)
- Sterilize jars and lids as above.
- Juice extraction: Place 6–8 cups blackberries and 1–2 cups water in a large pot. Heat gently to simmer and cook until the berries are very soft, 10–20 minutes, mashing occasionally to release juices.
- Strain juice: Pour the cooked berries into a jelly bag lined with cheesecloth or a fine mesh sieve over a bowl. Let the juice drip slowly without pressing to keep jelly clear. Allow 2–4 hours or overnight in the refrigerator for maximum clarity and yield.
- Measure juice: Measure extracted juice. For each cup of juice, plan roughly 3/4 to 1 cup sugar or follow your pectin package proportions. Add lemon juice — about 1/2 tablespoon per cup of juice — to balance acidity and aid setting.
- Heat juice with pectin: If using powdered pectin, mix per package directions with the juice, bring to a rolling boil, add sugar quickly, and boil hard for 1 minute. For no-pectin jelly, combine juice and sugar and boil until it reaches 220°F (105°C).
- Skim and jar: Skim any foam, ladle hot jelly into warm jars leaving 1/4 inch headspace, wipe rims, apply lids and bands.
- Process jars: Process in a boiling water bath for 10 minutes (adjust for altitude). Cool undisturbed and check seals.
Try one of these easy homemade desserts for a perfect pairing with your jam-filled pastries
Common Pitfalls and Solutions For Homemade blackberry jelly and jam recipe

- Jam/jelly doesn’t set: Causes include insufficient pectin, undercooking, excess juice, or incorrect sugar ratio. Fix by reheating and adding a small amount of powdered pectin (dissolved in water), or prolong cooking and retest. For no-pectin batches: cook down further, test frequently.
- Overcooked flavor/darkening: Avoid long, high heat after sugar is added. Bring to a short hard boil as instructed and remove promptly.
- Scorched bottom: Use heavy-bottomed pots and stir constantly when sugar is added. If scorching occurs, transfer unburnt portions to a clean pot and discard burned bits.
- Cloudy jelly: Avoid pressing pulp during juice extraction; allow juice to drip slowly. Strain through a jelly bag without squeezing.
- Unsealed jars: Ensure jar rims are wiped clean and lids are properly heated. If a jar does not seal, refrigerate and use within 2–3 weeks or reprocess with a new lid.
Short on time? Check these quick homemade dessert ideas that work beautifully with blackberry jam:
Tips and Self-Experience (Mistakes and Fixes) Best practices — concise list:
- Use ripe, flavorful fruit for best taste and natural pectin balance.
- Weigh fruit when possible (2 lbs ≈ 6 cups) to reduce variation.
- Keep jars hot before filling to avoid breakage and ensure a good vacuum.
- Keep lids in simmering water until use to soften the sealant.
- Use a candy thermometer to remove guesswork — 220°F is the traditional gel point (sea level).
- Add lemon juice: it brightens flavor and activates pectin.
- Work in small batches to better control cooking and clarity.
- Clean jar rims thoroughly before sealing.
- Allow jars to cool undisturbed for 12–24 hours before testing seals.
Personal-experience mistakes and fixes For Homemade blackberry jelly and jam recipe:
- Too-runny jam: Reheat gently, add 1–2 teaspoons powdered pectin dissolved in water, bring to a rolling boil for 1 minute, then re-jar. Alternatively, cook down longer to concentrate.
- Excess foam: Skim foam while still hot for clearer jars; foam is harmless but unattractive.
- Mold in refrigerated jam: Discard the jar; do not attempt to salvage. To prevent mold, use clean utensils and refrigerate after opening.
- Jars not sealing after water bath: Refrigerate contents and use within a few weeks, or reprocess: reheat jam, transfer to sterilized jars with new lids, and process again.
Variations and Customizations Ideas For Homemade blackberry jelly and jam recipe
- Reduced-sugar: Use low-sugar pectin and reduce sugar per pectin package directions. Consider replacing part of sugar with honey or maple syrup (up to 1/3) but follow low-sugar pectin guidance.
- No-sugar or sugar-free: Use no-sugar pectin products or alternative gelling agents (gelatin for refrigerator-only jams). Expect different texture and shorter shelf life.
- Spiced Blackberry Jam: Add 1/2 teaspoon cinnamon, a pinch of nutmeg, or a strip of lemon zest while cooking; remove whole spices before jarring.
- Herb-infused: Add a sprig of rosemary, thyme, or basil during cooking for savory-sweet notes; remove before jarring.
- Boozy finishing: Stir 1–2 tablespoons bourbon, brandy, or liqueur into cooled jam for depth (store refrigerated; do not can).
- Mixed-berry jam: Combine blackberries with raspberries, blueberries, or strawberries (up to 50% substitution) for complex flavor.
- Citrus twist: Add orange or lemon zest or include orange juice in the cooking liquid for a brighter profile.
- Freezer jam: Use less sugar and minimal cooking to preserve fresh fruit flavor, then freeze in airtight containers (not safe for shelf storage).
- For creamy dessert ideas, try 5 Irresistible Ricotta Cheese Recipes for sweet and savory inspiration.
- Pair your quick desserts with a simple dinner like Easy Stuffed Zucchini Boats for a complete weeknight meal.
Serving and Pairing Ideas For Homemade blackberry jelly and jam recipe

- Breakfast: Spread on toast, bagels, English muffins, pancakes, waffles, or croissants.
- Baking: Use as filling for thumbprint cookies, linzer tarts, danishes, turnovers, or layered into cake.
- Cheese board: Pair jelly with brie, camembert, goat cheese, or sharp cheddar. Add crackers and nuts.
- Glaze and sauces: Thin jelly with vinegar, wine, or stock to glaze roasted meats (pork, chicken, duck) or mix jam with mustard for a sandwich spread.
- Yogurt and oatmeal: Stir into plain Greek yogurt or hot oatmeal for fruity sweetness and color.
- Cocktails and mocktails: Muddle jam into gin, bourbon, or sparkling cocktails for a flavorful syrup; jelly can be used similarly when dissolved with warm water or liquor.
- Sandwiches: Classic peanut butter & jam, or pair jam with sliced turkey, arugula, and brie for a gourmet sandwich.
Storing and Reheating Storage Ideas For Homemade blackberry jelly and jam recipe
- Shelf-stable: Properly processed, sealed jars keep up to 1 year in a cool, dark pantry. Best flavor within 6–12 months.
- Refrigeration: Opened jars keep 3–4 weeks in the refrigerator. Unprocessed refrigerated jam should be used within 2–3 weeks.
- Freezing: Jam and jelly freeze well in airtight freezer-safe containers or jars (leave headspace). Thaw in fridge; texture may be slightly softer.
- Refrigerator-only jam (no canning): Keep for 2–3 weeks and use promptly.
Reheating Ideas For Homemade blackberry jelly and jam recipe
- Microwave: Warm small portions in short bursts, stirring in between to prevent scalding.
- Stovetop: Gently reheat in a small saucepan over low heat, stirring until thawed or loosened; add a tablespoon of water if overly thick.
- Reprocessing jars: If refrigerated jam needs to be shelf-stable again, reheat to boiling, refill sterilized jars, and process in a boiling water bath for 10 minutes following safe canning practices.
Safety and spoilage Ideas For Homemade blackberry jelly and jam recipe
- Discard jars with bulging lids, off odors, or visible mold.
- If mold forms on refrigerated jam, discard the entire jar.
- Always use clean utensils to scoop jam to minimize contamination.
FAQs about Ideas For Homemade blackberry jelly and jam recipe
Q: How much sugar does a homemade blackberry jelly and jam recipe need?
A: Sugar aids flavor, preservation, and setting. Typical jam uses about 3 to 3 1/2 cups sugar for 6 cups berries. Use low-sugar pectin to reduce sugar, following the pectin package directions.
Q: Can I make a low-sugar or sugar-free homemade blackberry jelly and jam recipe?
A: Yes. Use certified low-sugar or no-sugar pectin products, replace part of sugar with honey or approved sweeteners, or make freezer jam (not shelf-stable). Expect texture and shelf-life differences.
Q: What’s the difference between blackberry jam and jelly in this homemade recipe?
A: Jam contains crushed fruit and seeds for texture and body; jelly is made from fruit juice only, producing a clear, smooth spread. Both start from the same fruit but diverge at the straining step.
Q: Why didn’t my jam set when following the homemade blackberry jelly and jam recipe?
A: Common reasons: insufficient pectin, undercooking, too much juice, incorrect sugar ratio, or high altitude. Fix by reheating with added pectin or cooking longer, and follow altitude adjustments for boiling points.
Q: Can I use frozen blackberries for this homemade blackberry jelly and jam recipe?
A: Yes. Thawed frozen berries can be used; drain excess liquid for jam, or use extra berries for jelly. Expect yield and cooking time variation.
Q: How long does a homemade blackberry jelly and jam recipe last?
A: Properly canned jars last up to a year in cool, dark storage (best within 6–12 months). Opened jars keep 3–4 weeks refrigerated.
Q: Is homemade blackberry jelly and jam recipe safe for canning?
A: Yes, if you follow tested canning procedures: sterilize jars, use proper headspace, and process jars in a boiling water bath for the recommended time (adjust for altitude). Use trustworthy canning resources for exact processing times.
Q: Can I remove seeds from blackberry jam?
A: Yes. For fewer seeds, press mashed berries through a fine sieve or food mill. For seedless jelly, extract juice with a jelly bag and avoid pressing the pulp to keep clarity.
Final Thoughts to Homemade blackberry jelly and jam recipe
A homemade blackberry jelly and jam recipe is an accessible, rewarding project that transforms seasonal berries into versatile pantry staples. Whether you prefer the jewel-like clarity of jelly or the textured fruitiness of jam, making preserves at home lets you control sweetness, texture, and flavor. With simple equipment, attention to sterilization and testing for set, and a few practical tips, you can produce beautiful, flavorful jars ideal for everyday enjoyment or thoughtful gifts. Try variations—herb-infused, spiced, boozy finishes, or reduced-sugar versions—to create unique jars that reflect your taste. Enjoy the process and the bright results of your Homemade blackberry jelly and jam recipe.
For more delicious baking inspiration, come join us on Facebook at RyanRecipes. Follow us to stay updated with our latest creations and share your culinary adventures with our vibrant community!
Embarking on the journey of making blackberry jelly and jam not only enhances your culinary skills but also allows you to savor the essence of summer year-round. The process involves selecting ripe blackberries, mastering the art of cooking down the fruit, and achieving the perfect consistency through careful attention to the gelling process. Each jar encapsulates not only the flavor of fresh blackberries but also the joy of homemade craftsmanship. By exploring various flavor combinations and techniques, you can elevate your preserves, making them a delightful addition to any meal or occasion.