
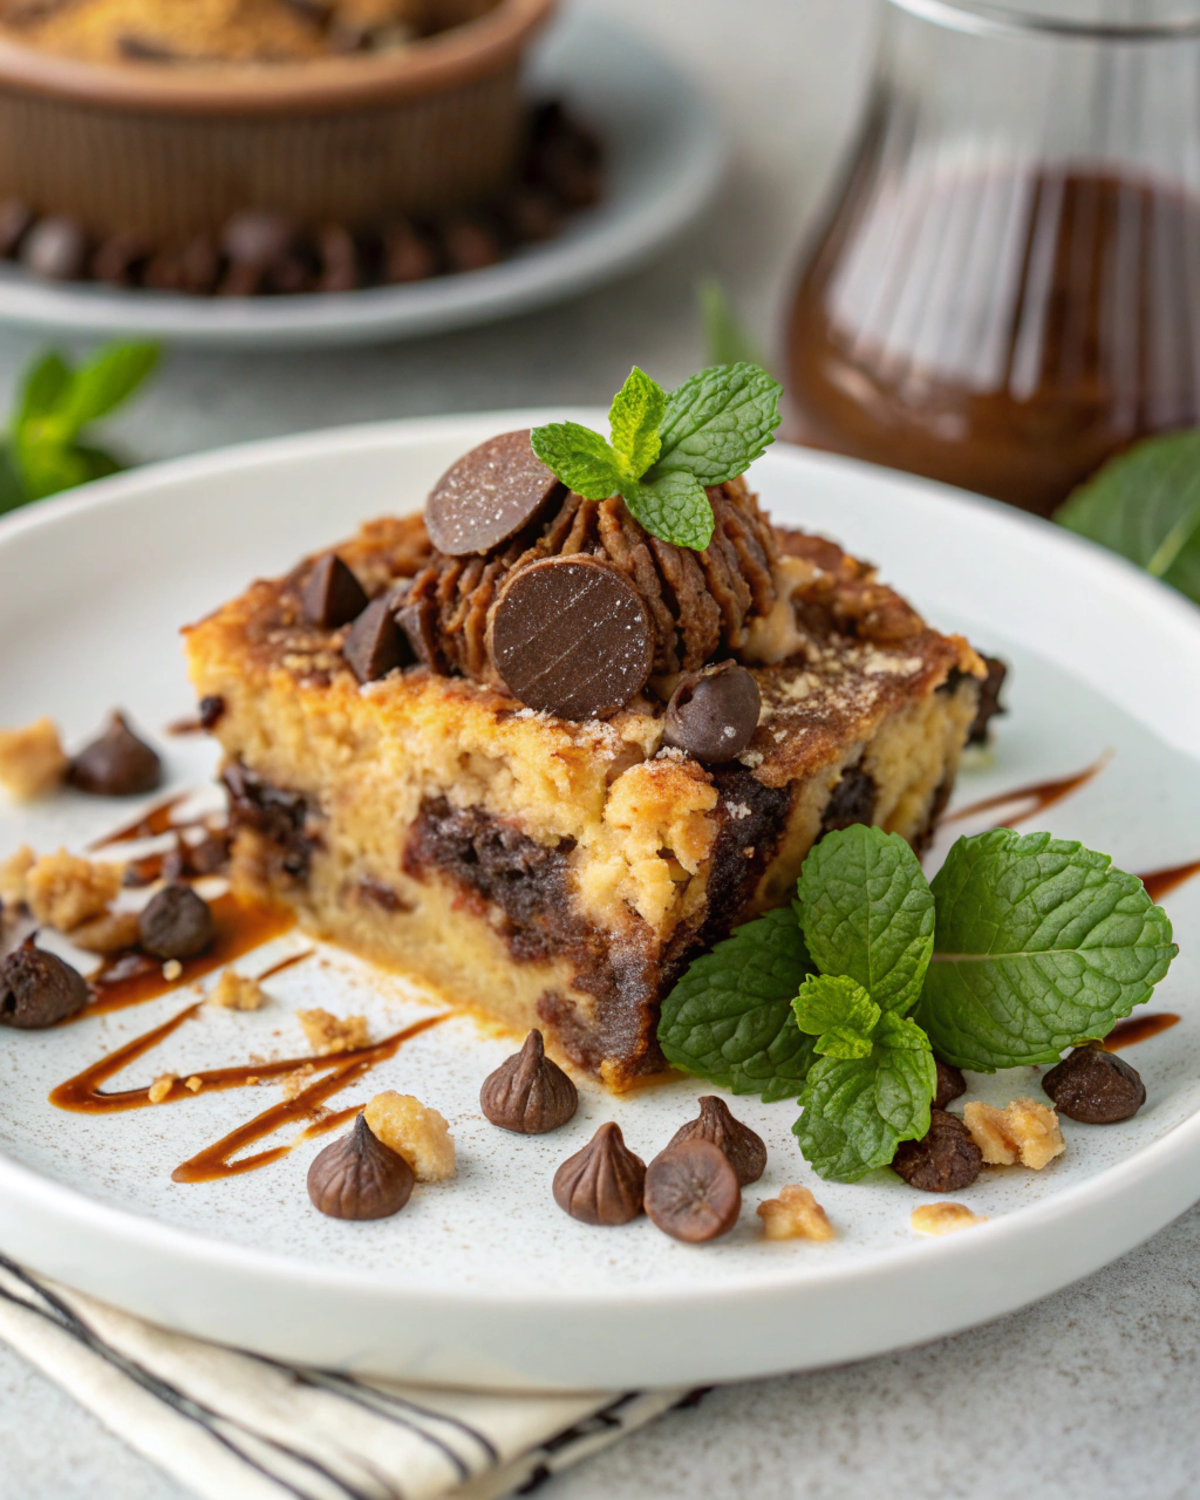
The Peanut Butter Cup Dump Cake is a luscious, irresistible dessert that combines the creamy richness of peanut butter cups with the convenience and comforting flavor of a traditional dump cake. Known for its simplicity and indulgent taste, this recipe is perfect for those looking for a quick, satisfying treat without extensive baking skills. Whether served at family gatherings, potlucks, or as a special dessert for loved ones, it’s a crowd-pleaser that delivers on both flavor and ease. Its versatility means you can adapt it for various occasions, making it a go-to dessert for peanut butter lovers and casual bakers alike.
Why Choose This Peanut Butter Cup Dump Cake Recipe
There are many reasons to opt for a Peanut Butter Cup Dump Cake. Its unbeatable combination of chocolate and peanut butter appeals to a broad spectrum of taste buds, promising a flavor-packed experience with minimal effort. It’s an excellent choice for busy households or last-minute gatherings because of its quick assembly and straightforward baking process. The recipe also offers flexibility—adding nuts, caramel, or a drizzle of chocolate can elevate it further. Nutritional considerations include the possibility of customizing ingredients for dietary needs, such as gluten-free or reduced-sugar options. Overall, this dump cake is celebrated not only for its rich taste but also for its simplicity, making it accessible to cooks of all skill levels.
“Looking for more indulgent treats? Check out our Chocolate Custard Cake or explore our No-Bake Cheesecake Recipes for quick dessert options.”
Ingredients for Peanut Butter Cup Dump Cake and How to Choose Them

Ingredients:
- Peanut Butter Cups (12-16 oz):
Choose quality peanut butter cups, such as Reese’s or store brands with a smooth or chunky filling, depending on preference. For a richer flavor, opt for cups with higher cocoa content or natural peanut butter options. If allergies are a concern, consider soy-free or nut-free alternatives. - Cake Mix (yellow or chocolate, about 15.25 oz):
A standard store-bought cake mix works best for ease. Select a brand you trust—name brands tend to have better texture and flavor, but store brands are just as effective and budget-friendly. - Butter (½ cup or 1 stick):
Use unsalted butter for better control over salt content. Choose high-quality butter for a richer flavor, and melt it thoroughly for even distribution. - Evaporated Milk (1 cup):
This adds moisture and richness. Use full-fat for maximum flavor; if you prefer a lighter version, skim evaporated milk works but may alter the texture slightly. - Optional Add-ins:
Chopped nuts, mini marshmallows, caramel bits, or a pinch of sea salt can add layers of texture and flavor.
Tips for Choosing Ingredients:
- Always check the expiration date on packaged ingredients.
- For the cake mix, consider organic or gluten-free options if necessary.
- For peanut butter cups, choose fresh, unblemished wrappers for best results.
- Freshness of ingredients, especially butter and milk, impacts the overall taste and texture.
“Try our classic Vanilla Cake or Blueberry Coffee Cake to complement your baking repertoire.”
Step-by-Step Preparation for making a Peanut Butter Cup Dump Cake

Step 1: Preheat Your Oven
- What to do:
Turn on your oven and set it to 350°F. While it’s heating up, prepare your baking dish. - Tip:
Allow the oven to fully preheat before placing the cake inside. This ensures even baking from the start. - Prepare your dish:
Use a 9×13-inch baking dish, which is ideal for the size of the recipe. Lightly grease it with butter or non-stick spray to prevent sticking. Alternatively, you can line it with parchment paper for easy removal and cleanup.
Step 2: Arrange Peanut Butter Cups
- What to do:
Place the peanut butter cups evenly across the bottom of your prepared dish. Try to space them out so that they’re relatively close but not overlapping excessively. - Technique:
If you want more uniform melting or a more even distribution of peanut butter filling, chop larger peanut butter cups into smaller pieces before placing them. Scatter these pieces evenly, which helps create pockets of peanut butter throughout the cake. - Tip:
Make sure the cups are placed flat and in a single layer. This ensures consistent melting and flavor distribution.
Step 3: Sprinkle Cake Mix
- What to do:
Evenly sprinkle the dry cake mix over the peanut butter cups. Avoid dumping it all in one spot; instead, use your hand or a spoon to distribute the mix evenly. - Why:
Covering all the peanut butter cups uniformly guarantees that the flavor is consistent and that the cake has a balanced texture. - Tip:
Gently press down on some areas while sprinkling to help the mix settle into the cups and create a more cohesive surface after baking.
Step 4: Drizzle with Melted Butter
- What to do:
Melt the butter completely—either in the microwave in 20-30 second bursts or on the stovetop. Then, slowly pour the melted butter over the cake mix layer. - Technique:
Use a spoon or a spatula to help guide the butter evenly across the surface. Pouring slowly allows the butter to seep into the dry mix and helps create a moist crumb and a golden crust. - Why:
The butter is essential for developing flavor and texture—without it, the cake may turn out dry or crumbly. - Tip:
Make sure the butter is still warm and liquid when pouring. If it starts to solidify, reheat briefly.
Step 5: Add Evaporated Milk
- What to do:
Slowly pour the evaporated milk over the entire surface of the cake. Aim for a gentle, even pour to allow the milk to seep into all parts of the cake mix. - Technique:
Pour in a slow, steady stream, moving your hand around the dish to distribute the milk evenly. This helps prevent areas from becoming overly wet or dry. - Why:
The evaporated milk adds richness and helps keep the cake moist as it bakes. It also helps create a slightly custardy texture that complements the other flavors. - Tip:
If you want more intense flavor, you can sprinkle a little extra cinnamon or sea salt before baking.
Step 6: Bake
- What to do:
Place your dish in the preheated oven. Bake for 40-45 minutes. - What to look for:
The top should turn a deep golden brown, and bubbling should be visible around the edges. The center may still be soft but should have set. - Technique:
To prevent overbaking, start checking at around 40 minutes. You can insert a toothpick in the center—if it comes out with moist crumbs but no wet batter, it’s ready. - Common Pitfall:
Over-baking can dry out the cake. Conversely, under-baking may leave it too gooey. Keep an eye on the color and bubbling.
Step 7: Cool and Serve
- What to do:
Once baked, remove the dish from the oven and let it rest for at least 10 minutes. This cooling period allows the cake to set, making it easier to serve clean slices. - Serving tips:
Serve warm for a gooey, melty experience or at room temperature for a firmer texture. Top with ice cream, whipped cream, or a drizzle of chocolate sauce to elevate it further.
“Get the perfect bake every time with our Cake Pans and Baking Tips and How to Make the Best Angel Food Cake.”
Tips and Best Practices for Making Peanut Butter Cup Dump Cake


- Use Fresh Ingredients:
- Always check expiration dates on your peanut butter cups, cake mix, butter, and evaporated milk to ensure optimal flavor and texture.
- Properly Prepare the Baking Dish:
- Grease your 9×13-inch baking dish thoroughly or line it with parchment paper to prevent sticking and make cleanup easier.
- Even Layering:
- Distribute the peanut butter cups as evenly as possible across the bottom of the dish for consistent melting.
- When sprinkling the cake mix, spread it out uniformly to ensure even baking and flavor.
- Chop Larger Peanut Butter Cups:
- Consider chopping some larger peanut butter cups into smaller pieces for better distribution and more gooey pockets of peanut butter throughout.
- Ensure Even Coverage of Butter:
- Melt the butter completely and pour slowly, using a spoon or brush to evenly distribute it over the cake mix.
- This prevents dry spots and promotes a golden, crispy top.
- Pour Evaporated Milk Carefully:
- Pour slowly and in a zigzag or circular pattern to help the milk seep into all layers evenly, keeping the cake moist and flavorful.
- Avoid Overbaking:
- Check the cake at the 40-minute mark. The top should be golden brown and bubbly; overbaking can lead to dryness.
- Use a toothpick test—insert into the center and ensure it comes out with moist crumbs but no batter.
- Let It Rest Before Serving:
- Allow the cake to cool for at least 10 minutes after baking. This helps it set and makes slicing easier without everything falling apart.
Variations and Customizations Ideas For Peanut Butter Cup Dump Cake
One of the best aspects of a Peanut Butter Cup Dump Cake is its incredible flexibility, allowing you to customize it to suit different tastes, dietary needs, or occasions. Here are some creative ideas:
Nut-Free Version
- What to do:
Swap out the peanut butter cups for chocolate chips, caramel bits, or dairy-free chocolate chunks if allergies or nut sensitivities are a concern. - Tip:
Use allergy-friendly products or choose nut-free brands to make this treat suitable for classrooms, parties, or those with dietary restrictions.
Add-Ins for Extra Texture
- Mini Marshmallows:
Sprinkle mini marshmallows on top before baking for a gooey, stretchy element reminiscent of s’mores. - Chopped Nuts:
Incorporate chopped peanuts, almonds, or pecans into the cake mix for crunch and added flavor. - Caramel Bits:
Distribute caramel bits throughout to add pockets of gooey caramel goodness. - Chopped Cookies or Oreos:
Mix crushed cookies into the batter or layer them to introduce additional crunch and flavor.
Flavor Boosts
- Vanilla or Almond Extract:
Mix a teaspoon of vanilla or almond extract into the cake mix or drizzling ingredients for deeper flavor. - Spices:
Add a pinch of cinnamon, nutmeg, or pumpkin spice to enhance warmth, especially perfect during fall. - Swirls or Drizzles:
Before baking, swirl in peanut butter, caramel sauce, or chocolate chunks for a marbled effect and intensified flavor.
Different Chocolate Options
- Reese’s Pieces:
Use Reese’s Pieces candies as a colorful and crunchy chocolate alternative. - Chocolate Chips:
Layer mini chocolate chips in the batter or sprinkle on top before baking for melty goodness. - Dark Chocolate or Unsweetened Cocoa:
Mix cocoa powder into the cake mix to deepen the chocolate flavor naturally.
Healthy Twists
- Reduced Sugar or Sugar-Free Mixes:
Select sugar-free cake mixes and dark chocolate to make a lower-sugar version. - Add Vegetables:
Incorporate grated zucchini or carrots into the cake batter to boost moisture and nutrition without altering taste significantly. - Whole Grain or Gluten-Free Options:
Use whole wheat or gluten-free cake mixes to cater to specific dietary needs while maintaining flavor.
Presentation Ideas for Peanut Butter Cup Dump Cake
- Mini Servings:
Serve in individual mason jars or ramekins for a rustic, portable presentation. - Fruits and Toppings:
Top individual slices with fresh berries, slices of banana, or a drizzle of chocolate or caramel sauce. - Layered Dessert:
Turn it into a layered trifle with whipped cream, fresh fruit, and crumbled pieces for an elegant dessert.
“In a hurry? Discover our Easy Dessert Recipes or try out our Simple Breakfast Ideas for fast meals.”
Serving and Pairing Ideas For Peanut Butter Cup Dump Cake

Peanut Butter Cup Dump Cake is a versatile dessert that pairs well with a variety of accompaniments and presentation styles:
Ice Cream & Frozen Treats
- Flavor Suggestions:
Vanilla is classic, but chocolate, peanut butter, or even caramel-flavored ice cream work beautifully. - Method:
Serve a warm slice topped with a scoop of your favorite ice cream for melty goodness.
Fresh Fruit & Fruit Sauces
- Fruits:
Strawberries, fresh raspberries, sliced bananas, or chopped peaches offer a bright, tart contrast to the rich cake. - Sauces or Coulis:
Drizzle with chocolate, caramel, or fruit coulis for added flavor and visual appeal.
Beverages
- Hot Drinks:
Coffee, espresso, or hot chocolate complement the richness. - Cold Drinks:
Milk (regular or plant-based), milkshakes, or even a chilled glass of cold brew elevate the dessert experience.
Other Toppings & Garnishes
- Whipped Cream:
A generous dollop adds creaminess and a light texture. - Chopped Peanuts or Nuts:
Garnish with roasted peanuts or almonds for extra crunch. - Chocolate or Caramel Syrup:
Drizzle on top for an extra decadent touch. - Sprinkles or Edible Glitter:
Perfect for parties or special occasions.
Creative Serving Ideas
- Breakfast-style:
Serve with Greek yogurt and sliced fruit for a sweet but balanced breakfast. - Party Presentation:
Use individual mini jars or cups for a charming, portable dessert during gatherings.
“Looking for healthier options? Explore our Healthy Quinoa Salad or Low Carb Vegetable Dishes.”
Storing and Reheating Ideas For Peanut Butter Cup Dump Cake

Proper storage and reheating are key to maintaining the deliciousness of your Peanut Butter Cup Dump Cake, whether you’re enjoying leftovers or preparing it ahead of time.
Storing Leftovers
- Airtight Container:
Once cooled, transfer any leftover cake to an airtight container or cover the entire dish tightly with plastic wrap or aluminum foil. This prevents drying out and protects it from absorbing other fridge odors. - Room Temperature:
For up to 24-48 hours, you can store individual slices or the whole dish at room temperature in a covered container. Keep it in a cool, dry place away from direct sunlight. - Refrigeration:
For extended freshness, refrigerate leftovers in an airtight container for up to 4-5 days. Keep in mind that refrigeration may slightly alter the texture, making it a bit firmer or denser, especially if it contains cream or fruit toppings. - Freezing:
To store for even longer, wrap individual portions tightly in plastic wrap, then place in a freezer-safe zip-top bag or container. Freeze for up to 2-3 months. Let thaw in the refrigerator overnight or at room temperature for a couple of hours before reheating.
Reheating Tips for Best Results
- Microwave:
For quick reheating, place a slice or portion on a microwave-safe plate. Microwave in 20-30 second intervals until warmed through. Cover with a damp paper towel to prevent drying out. Be cautious—overheating can make the cake rubbery or overly dry. - Oven:
To reheat larger portions or the entire dessert, preheat your oven to around 300°F (150°C). Place the cake in an oven-safe dish, cover it loosely with foil to prevent excessive dryness, and heat for 10-15 minutes. This method preserves moisture and gives a more evenly heated result. - Stovetop:
Reheat on low heat in a covered skillet or saucepan, stirring gently if necessary, until warmed. This method is less common but works if you prefer to avoid the microwave or oven.
Additional Tips for Peanut Butter Cup Dump Cake
- Add moisture: When reheating, if the cake seems dry, drizzle a little extra evaporated milk or a splash of cream over the top.
- Serve immediately: The dessert is best enjoyed warm or at room temperature to preserve its gooey, melted texture.
- Avoid over-reheating: Excessive reheating can cause the cake to become dry, tough, or rubbery, so keep an eye on timing.
FAQs about Peanut Butter Cup Dump Cake
Q1: What is a Peanut Butter Cup Dump Cake?
A: A Peanut Butter Cup Dump Cake is a quick, easy-to-make dessert that combines layers of peanut butter cups, cake mix, melted butter, and milk, baked until bubbly and golden. It’s called “dump cake” because you simply “dump” the ingredients into a pan without complex mixing, making it a perfect no-fuss treat for peanut butter and chocolate lovers.
Q2: Can I customize my Peanut Butter Cup Dump Cake with different toppings?
A: Absolutely! You can add chopped nuts, mini marshmallows, caramel bits, or even fresh fruit to your Peanut Butter Cup Dump Cake before baking to customize the flavor and texture to your liking.
Q3: How long does it take to make a Peanut Butter Cup Dump Cake from start to finish?
A: The entire process, including baking, takes about 50 minutes—roughly 10 minutes for prep and 40-45 minutes of baking. The cake is quick to assemble, making it ideal for last-minute dessert cravings.
Q4: Is Peanut Butter Cup Dump Cake suitable for dietary restrictions?
A: You can modify your Peanut Butter Cup Dump Cake to suit dietary needs. For instance, use gluten-free cake mixes or sugar-free versions to reduce sugar, or substitute dairy-free ingredients if needed. Just be aware that these substitutions may alter the flavor or texture slightly.
Q5: How can I store leftovers of my Peanut Butter Cup Dump Cake?
A: Store leftovers in an airtight container or cover the dish tightly with plastic wrap. Keep in the refrigerator for up to 4-5 days, or reheat portions in the microwave for a quick warm-up. Reheating helps restore its gooey, fresh-from-the-oven texture.
Q6: What are some popular ways to serve a Peanut Butter Cup Dump Cake?
A: Serving suggestions include a scoop of vanilla or chocolate ice cream, a drizzle of chocolate or caramel sauce, whipped cream, or fresh berries. For breakfast twists, serve with Greek yogurt and sliced fruit.
Q7: Can I make a Peanut Butter Cup Dump Cake in advance?
A: Yes! You can prepare the cake assembly a day ahead, cover it, and bake it just before serving. This makes it a convenient option for parties or family gatherings.
Q8: What makes a Peanut Butter Cup Dump Cake so popular?
A: Its popularity stems from its rich, indulgent flavor combined with an effortless, quick preparation process. It’s perfect for peanut butter and chocolate fans looking for a satisfying dessert without fuss.
Final Thoughts on Peanut Butter Cup Dump Cake

The Peanut Butter Cup Dump Cake is a winning dessert that combines ease, indulgence, and versatility in every bite. Its simple assembly and rich flavors make it an ideal choice for busy weeknights, weekend gatherings, or special celebrations. Whether you stick to the classic recipe or explore creative variations, this dessert is sure to satisfy peanut butter and chocolate lovers of all ages. Its adaptability allows you to customize it to suit dietary preferences or personal tastes, making it a staple treat in any kitchen. Give this delicious, no-fuss dessert a try—you might just find it your new go-to favorite for every occasion!
“Celebrate any occasion with our festive Birthday Cake or cozy fall recipes like Warm Fall Warming Dishes.”
For more delicious recipes and baking inspiration, come join us on Facebook at RyanRecipes. Follow us to stay updated with our latest creations and share your culinary adventures with our vibrant community!
The Peanut Butter Cup Dump Cake serves as a testament to the harmonious blend of flavors that elevate any dessert experience. Its effortless preparation is complemented by the opportunity for personalization, ensuring that it caters to diverse palates and dietary needs. By incorporating seasonal ingredients or unique flavor profiles, this versatile dish can seamlessly transition from a comforting weeknight indulgence to an elegant centerpiece for festive occasions. Engage with our community on Facebook at RyanRecipes for more delightful recipes and to exchange your culinary experiences.
1 thought on “Peanut Butter Cup Dump Cake: A Decadent and Versatile Dessert”